.png)
.png)
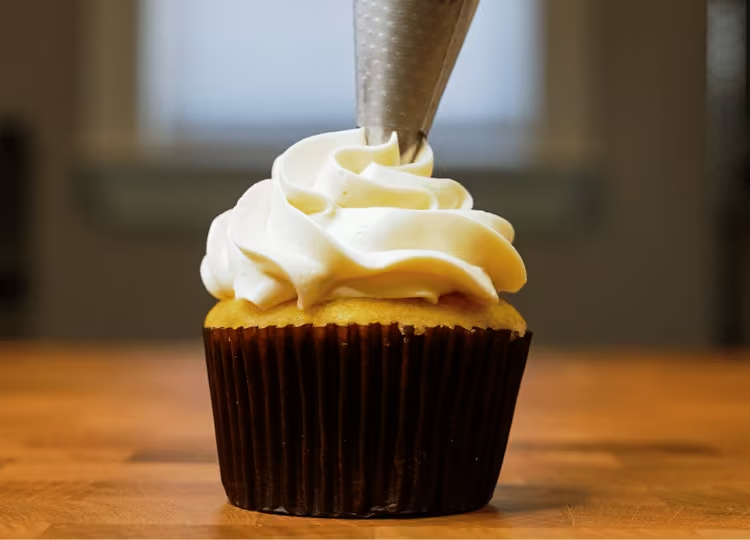
Perfect Swiss Meringue Buttercream: Your Complete Guide


Swiss Meringue Buttercream (SMBC) has a sweet vanilla-buttery flavor and an ethereal, melt-in-your-mouth texture. Due to its smooth finish, stability, and versatility in coloring, it's a top choice for cake decorators. My updated recipe refines the classic SMBC by incorporating techniques that reduce its buttery heaviness while remaining easy to re-whip after refrigeration. It works with raw and pasteurized egg whites, offering flexibility for different baking needs.

Welcome to my ultimate Swiss Meringue Buttercream guide!
We'll explore texture, aeration, and ingredient chemistry and learn how this frosting differs. Learn if it's suitable for your dessert and get the exact process to understand and customize your perfect Swiss Meringue Buttercream.
What is Swiss Meringue Buttercream?
My Swiss Meringue Buttercream is a type of True Buttercream, which is a large family of butter-based frostings made by creating stable emulsions.

Swiss Meringue Buttercreams are part of the True Buttercream Family and the larger Emulsions category. Frostings within the same group share similar characteristics, making it easy to navigate the world of frostings.
True Buttercreams are a family of stable emulsion frostings, where fat and water-based ingredients are mixed to create a thick, creamy texture. I often refer to these as “emulsion-based buttercreams.”
Generally, True Buttercreams are:
- moderately sweet,
- low in aeration,
- creamy and buttery in texture,
- able to create intricate piped designs and smooth cake sides,
- excellent in stability at room temperature and under pressure, and
- easily dyed and flavored.
So, what sets Swiss Meringue Buttercream apart from other Frostings?
Let’s get into the specifics of this buttercream:

What is the texture of Swiss Meringue Buttercream?
Swiss Meringue Buttercream is incredibly silky and smooth, with a melt-in-your-mouth texture. This is achieved through emulsification, which evenly distributes the meringue syrup throughout the butterfat, reducing the buttery flavor and texture. With a fat content of 30%, this buttercream has a moderate fat level.
I measure the aeration of my frostings, which is the percentage of volume occupied by air. Generally, my European buttercreams have low aeration, with Swiss Meringue Buttercream at around 12%. This means that for any given volume of frosting, 12% is air, while the rest comprises ingredients like butter, sugar, and water. For comparison, a highly aerated frosting like whipped cream can have up to 50% air.
Interestingly, the meringue itself offers very little in terms of aeration. Regarding contributing to texture, it seems as if the meringue plays a more significant role in the emulsion in breaking up the butterfat, which can feel heavy on the palate. If you’d like to learn more about this topic, read my Frosting Butter Guide.
Aeration is critical in understanding texture, affecting mouthfeel, greasiness, and spreadability. Although most of my emulsion-based frostings have low aeration, don’t let that deter you. Air isn’t the only factor influencing texture. In emulsion-based frostings, the high ratio of silky or creamy syrups interlaced with butterfat creates the luxurious, melt-in-your-mouth creaminess of the final buttercream.
What is the taste and flavor of Swiss Meringue Buttercream?
The overall flavor of this buttercream is sweetened vanilla butter. Swiss Meringue Buttercreams tend to be on the buttery side, but I’ve tempered this with my method, which creates a more balanced buttercream. Interestingly, the meringue doesn’t offer too much flavor. There is a hint of egginess, but for the most part, meringue offers a more overwhelming sweetness than anything else.
What ingredients do you need for Swiss Meringue Buttercream?

1 | EGG WHITES
Egg whites are the translucent, viscous fluid surrounding the egg yolk. In this frosting, they provide proteins and water. The proteins provide bulk and a bit of structure for the buttercream, whereas the water helps dissolve the sugar, yielding a creamier, smoother buttercream.
This recipe can use raw or pasteurized (carton) egg whites. Both yield nearly identical buttercreams, but the method will be slightly different. We’ll go over the differences in the step-by-step tutorial below.
2,4 | POWDERED SUGAR (OR GRANULATED WHITE SUGAR)
We use sugar two times in this recipe.
The first and larger amount is used to create the meringue syrup. For this, you can use either powdered or white granulated sugar. Although I have powdered sugar pictured here, I prefer to use granulated white sugar for the meringue step. American powdered sugars contain some starch (usually corn or tapioca), which can have a granular texture when used in large amounts. You’ll need to heat the syrup to a higher temperature to cook the starches, which I typically don’t do when using pasteurized or powdered egg whites. It’s just a pure sugary taste and smoother feel with white granulated sugar.
The second and smaller amount of sugar must be powdered, which sweetens and slightly aerates the butter.
3 | UNSALTED BUTTER
Butter provides fat, stability, flavor, and emulsifiers for this frosting. The unique combination of milkfats (around 80-84%) gives butter its wonderful creamy and spreadable texture. Butter is integral for True Buttercreams because it also contains various emulsifiers, which hold water-based and fat-based ingredients together. I always use unsalted butter in all my frostings and add salt based on taste.
5 | VANILLA EXTRACT
Vanilla extract is a general flavor enhancer for baked goods, and here, it is the primary flavoring element for this frosting. Extracts are generally interchangeable to make easy flavor modifications, but be sure to google it. (For instance, almond extract is potent, and you’d likely want to start with 25% of the amount of vanilla.) Also, vanilla bean paste is lovely here as it adds little vanilla bean specks throughout the frosting.
Natural vanilla extract tends to be dark brown, which can make the final frosting a bit cream-colored. If you’re trying to minimize this, consider a clear vanilla extract. These extracts are artificially flavored, but I like them in cakes and frostings.
6 | FINELY GRANULATED SALT
A pinch of salt enhances the flavor and balances the overall sweetness of this frosting. I typically use flaky kosher salt in my baking, but crispy salt bits are not appealing in frostings, so I exclusively use finely granulated salt. This allows the salt to dissolve more readily.
Do you need cream of tartar for Swiss Meringue Buttercream?
No, it’s not necessary. In previous versions of my Swiss Meringue Buttercream, you may have seen cream of tartar listed. This acidic ingredient helps unstick the egg proteins in the white from each other, yielding a fluffier meringue. Aeration of the meringue, however, is not as important as one might think for this buttercream. I go into more detail in the section below.
Step by step:
How to make my Swiss Meringue Buttercream Frosting
You can use raw or pasteurized (carton) egg whites for my recipe. The final buttercream will be nearly identical no matter which one you choose. In the tutorial below, I’m using raw egg whites, which require cooking to a specific temperature to kill food-borne illness-causing bacteria. Pasteurized egg whites do not need this, so I’ll note the changes in the protocol below.
STEP 1 | SET UP THE DOUBLE BOILER (BAIN-MARIE).
WHY:
Heating over a double boiler reduces the risk of overheating or heating a mixture too quickly. This method is commonly used in delicate preparations sensitive to extreme changes in temperatures and high heat, such as chocolate, custards, and meringues.
HOW:

Find a pot that allows a large bowl to sit on top. You don’t want to create a tight seal, as steam needs to escape. Here, I’m using a bit of foil, which allows for a slight gap for steam release (1a). Fill the pot with water so it’s within an inch of the bottom of your bowl, but don’t allow it to sit in the water (1b).
Some bakers told me it takes forever to heat the meringue syrup. This could be for a couple of reasons. The surface of the water is where the temperature of the fog is greatest, so you likely have too big of a gap between the bottom of the bowl and the surface of the water. Also, try to use a metal bowl, which conducts heat much more quickly and efficiently than glass. I’m using glass here because it’s easier for you to see what’s going on for demonstration purposes.
STEP 2 | HEAT THE MERINGUE SYRUP and WHIP THE MERINGUE (OPTIONAL).
WHY:
The meringue syrup is made of egg whites with sugar. You can use powdered or white granulated sugar here, as the meringue syrup will be heated high enough to dissolve any type.
For raw egg whites, use a thermometer to heat the mixture to at least 160°F (71°C) to eliminate any potential Salmonella. At this stage, the mixture will be runny but safe to consume.
A thermometer isn’t necessary with pasteurized egg whites since they’ve already been treated to kill bacteria. Here, the goal is simply to dissolve the sugar, which happens more efficiently at higher temperatures. Just use your fingers to feel if any granules are left.
HOW:

Add sugar and egg whites to a large heat-proof mixing bowl (2a). (If you plan on whipping your meringue, use the bowl of your stand mixer.) Stir with a spatula until the sugar is evenly distributed (2b).

Once your double boiler is at a gentle simmer, use the foil to prop the bowl if necessary (2c), and place the bowl on top (2d).

Use a spatula to stir gently periodically and heat until the egg syrup reaches 160°F (71°C) (2e). Alternatively, pasteurized egg whites don’t need a thermometer. Use your fingers to gently (careful, it’s hot!) feel the meringue syrup and ensure no sugar granules (2f). Then, carefully remove the bowl and pour the hot syrup into a heat-proof bowl or measuring cup (2g).
Optionally, you can whip the meringue syrup to create a foam after it reaches the desired temperature. However, there is little difference in the final buttercream texture (see my Frosting Butter Guide). Note that if you use pasteurized egg whites, you'll get considerably less foaming than with fresh eggs. If you choose to do this, place the bowl in your stand mixer and use the whisk attachment to mix on high speed until stiff peaks form. Then, transfer the meringue to another bowl to prepare the frosting butter in the next step. There is no need to clean the bowl.
An important thing to note is that if you choose to whip the meringue syrup and it doesn’t whip up to your desired volume (or at all), it’s perfectly fine to proceed with the recipe.
Potential Pitfalls:
Some bakers find that heating the meringue syrup takes too long. This is often due to a large gap between the bowl and the water, as the hottest steam is at the surface. To speed up the process, ensure the bowl sits closer to the water and use a metal bowl, which conducts heat more efficiently than glass. I’m using glass here for demonstration so you can see the process more clearly.
STEP 3 | PREPARE THE FROSTING BUTTER.
WHY:
A common complaint about True Buttercreams is their overly buttery taste and feel. To address this, I've developed a pre-conditioning method for the butter called "Frosting Butter." This technique aerates, pre-sweetens, and flavors the butterfat, ensuring an optimal creamy texture and temperature for emulsification, which is crucial for all True Buttercreams. The final buttercream is silky smooth and doesn't taste overly buttery. Additionally, frostings made with Frosting Butter are easier to re-whip without curdling after refrigeration or freezing. To learn more about the science of Frosting Butter, read my guide here.
HOW:

For proper aeration, ensure the butter temperature is around 60-70 °F (15-21 °C) (3a). You don’t need a thermometer, but when the butter is at this temperature, you should be able to slide the whisk attachment into it with moderate pressure (3a, inset).

Add the butter to your mixing bowl and whisk on high speed for about 3-5 minutes, scraping down the sides at least once (3b). Aerated butter will still be paler, more voluminous, and ball up inside the whisk (3c).

Add the powdered sugar, vanilla extract, and a small pinch of salt (3d, e). Mix on high speed for another 2-3 minutes. You’ll notice that the butter is slightly glossier (that’s the sugar) but still has a good fluffy, voluminous texture that balls inside the whisk (3f).
STEP 4 | COMBINE THE COOLED MERINGUE SYRUP WITH BUTTER.
WHY:
Adding the meringue syrup in increments lets the butter emulsify gradually, producing a smooth and shiny buttercream.
HOW:

Ensure that your egg syrup (or foam) is at room temperature (4a) and add it to the Frosting Butter in 2 to 3 additions, whipping for about 1 minute after every addition (4b).

Once all the egg syrup has been added, mix for an additional minute on high speed (4c, d).
STEP 5 | SMOOTH AND ADJUST FOR FLAVORINGS.
WHY:
With all its wires, the whisk is much more efficient at emulsifying than a paddle with a thick singular wire. However, during the mixing process with a whisk attachment, we’ll inevitably mix in tons of air, which can further collect into larger air pockets. Switch the paddle attachment (one with a silicone edge, if you can), which smooths the frosting against the bowl and dramatically reduces the large air gaps in your final frosting.
HOW:


Switch over to the paddle attachment (5a) and smooth on the lowest speed for a few minutes (5b). Taste the buttercream and adjust for salt and vanilla. I have approval from my Mini Taste Tester (5c). The final buttercream will be silky smooth with a melt-in-your-mouth texture and ready to frost your cakes (5d).
Make Ahead and Storage Tips
Leftover Swiss Meringue Buttercream stores well in the fridge or freezer. It can also be made ahead of time for larger cake projects.
For a detailed tutorial, check out my How to Store Buttercream Guide.
Video
Honors Members Section
This extra material is accessible to Sugarologie Honors members.
Become a member to view extended research notes, technique analysis, and supplemental materials! Learn more about Sugarologie Honors here.
Already a member?
Before starting the recipe, please read this!
Measure by weight, if possible.
Measuring by weight is the best way for you to replicate my recipes. I develop recipes using ingredients (even liquids) measured in grams, which is why you see them listed first in the recipe cards. For measurements under 5 grams, I will typically only list the volumetric measurements (teaspoons, etc.), as most home scales are not precise for such small weights.
In most cases, I have converted grams to volumetric measurements (aka US customary units) for bakers who prefer this method. However, the measurements are not as precise and may have awkward proportions. The recipes should still work, but for the ultimate precision, try to use weight.
This is the OXO scale I use daily. I also purchased this budget version of a good scale, which I keep at my Mom’s house for baking. If you’re interested in other tools I use for my baking, I’ve compiled a list here.
Use room temperature ingredients.
All my ingredients should be used at room temperature, or 65-75 °F/18-24 °C. I will always indicate if you need something outside this range. If no details are given, room temperature is the default.
Pay attention to the ingredient descriptions.
I try not to be brand-specific, but I will always note an interesting result from a type of ingredient, be it negative or positive.
A specific note regarding salt: I use Diamond Crystal Kosher salt for everything on this site except for frostings. In frostings, you want the salt to dissolve more easily, and kosher salt tends to leave granules behind. If you substitute table salt (more finely granulated) for recipes that list kosher salt, you must use half the volume indicated in my recipes.
Substitutions are hard.
That said, substitutions aren’t impossible but can be the toughest part of recipe development. Small swaps, like reduced-fat milk (2% fat) for whole milk (3.5% fat), usually work fine. However, bigger changes—such as replacing oil with applesauce or sour cream with Greek yogurt—can significantly impact texture and density.
Be wary of general, all-purpose substitutions in baking; I find that usually there is never a one size-fits-all solution. I carefully select ingredients for my recipes, so for the best results, start with the original recipe and modify with caution.
Read all the recipe instructions before beginning.
I’m in the “Pre-read the Chapter before Class Lecture” club... and I invite you to join! Baking new recipes can be intimidating, so let’s set you up for success. I want you to think about timeframes. Most fillings and frostings can be made ahead of time, and give you an extra day for mental space. Also, as you become a more proficient baker, you can anticipate and recognize steps. (“Oh, this has a meringue step, so I’ll need an extra clean bowl…” etc.) Ensure you go down the ingredient list and have everything at the right temperature.
.avif)

%20(1).png)


Vanilla Swiss Meringue Buttercream
- 40 g (2 tablespoons + 2 teaspoons) fresh or pasteurized (carton) egg whites*
- 67 g (⅓ cup) white granulated sugar**
- 85 g (6 tablespoons) unsalted butter
- 7 g (1 tablespoon) powdered sugar***, sifted if clumpy
- ½ + ⅛ teaspoon vanilla extract
- small pinch of fine salt
For larger quantities or to accompany a cake recipe, go to my Cakeculator and select “Vanilla Swiss Meringue Buttercream.”
- 121 g (½ cup) fresh or pasteurized (carton) egg whites*
- 200 g (1 cup) white granulated sugar**
- 254 g (1 ⅛ cups) unsalted butter
- 23 g (3 tablespoons) powdered sugar***, unsifted
- 2 teaspoons vanilla extract
- ⅛ teaspoon fine salt
For larger quantities or to accompany a cake recipe, go to my Cakeculator and select “Vanilla Swiss Meringue Buttercream.”
- Set up the double boiler (bain-marie).
Choose a large pot that can hold a metal bowl without touching the bottom. If whipping egg whites, use your stand mixer bowl; otherwise, any metal bowl works.
Fill the pot with water so the bowl sits just above, but not touching, the surface—closer is better for efficient heating. Remove the bowl and bring the water to a gentle simmer. - Heat the meringue syrup.
Add egg whites and sugar to the bowl, stirring with a spatula until thick and gooey.
Place the bowl over the pot once a steady fog rises from the water. Stir continuously, scraping the sides to dissolve any sugar. As the mixture heats, it will thin out, turn opaque, and the sugar will fully dissolve.
- For fresh egg whites: Heat to 160-165°F (71-74°C) using a thermometer.
- For liquid pasteurized egg whites: Rub a small amount between your fingers—if no sugar granules remain, it's ready.
Whip the meringue (optional).
Whipping adds minimal aeration, so I often skip it. However, whether using whipped meringue or syrup, ensure it’s cooled to room temperature before adding butter.
To whip, use a whisk attachment at high speed until stiff peaks form. The timing varies depending on the volume, but the meringue is ready when it is very stiff and balls up inside the whisk.
Don't worry if the meringue doesn’t whip (e.g., due to yolk contamination); you can still proceed with the buttercream.
- Prepare the Frosting Butter.
If you used the stand mixer bowl to heat and whip your meringue, move it to another bowl. Then, you can use the bowl to make the frosting butter. You don’t need to clean it.
Add slightly softened butter to the stand mixer bowl and whisk on high for about 2 minutes, scraping down the sides once. The butter should become lighter in color and smoother and ball inside the whisk.
Add powdered sugar*** (see my notes below to assess how much to add), vanilla extract, and a pinch of salt, then whisk on medium-high for another 1-2 minutes.
- Combine the meringue/syrup with the Frosting Butter.
Add the room temperature syrup/meringue in 3–5 additions, mixing for 30 seconds each. Once fully incorporated, scrape the bowl and mix on high for 1 minute. - Flavor and smooth the frosting.
Switch to the paddle attachment and mix on low for a few minutes to remove air pockets. Taste and adjust vanilla or salt if needed. The frosting should be ultra-smooth and creamy.

Recipe Card - Adriana's Notes
*If you’re using fresh eggs, one large US egg contains around 28-33 g of egg whites. For example, you'll need about four eggs for a 3-cup batch of frosting. Also, you may use pasteurized egg whites sold in cartons. Refer to the introduction above to learn the difference between these egg products.
**You can use powdered sugar here, but ensure you use the weight measurement to get the necessary amount.
***You can vary the amount of powdered sugar. I’ve given a mid-range amount, creating a moderately sweet buttercream. You can double this amount to get a sweeter version. Some things to consider - emulsion buttercreams tend to get less sweet as they sit out (usually over 24 hours), so I usually err on the side of a tad sweet if I’m serving it the next day. Also, with these types of vanilla buttercreams, you can go only in one of two ways: sweet or buttery. In other words, if you tone down the sweetness, be prepared for a ~buttery~ buttercream. If this is what you like, you can omit powdered sugar entirely for a luxurious buttery version—just be sure to whip the butter thoroughly in Step 3 before adding the meringue to prevent a dense texture.
.avif)

Got room for more dessert?
Subscribe to my Crumby Data newsletter! I share behind-the-scenes looks at recipe development, flavor testing for the Cakeculator, and life as a content creator. It’s free, lands in your inbox every few weeks, and you can unsubscribe anytime...no strings attached :)
Feel free to take a look at previous newsletters here!
.ico)
.avif)